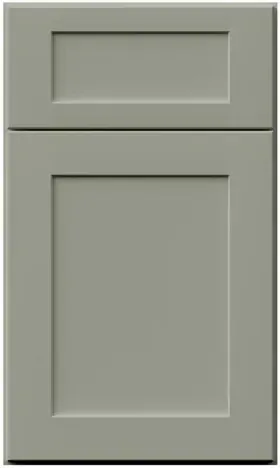


Galaxy Pistachio Green light rail molding: bulb colour, the tile line, and which trade goes first
Reviewed September 2026 · Captivating Cabinets
The bottom edge of a wall cabinet is a busy few inches. The cabinet stops there, the backsplash stops there, and the under-cabinet light lives there, and on Galaxy Pistachio Green uppers the trim that ties those three together is a strip of the same colour running under the whole run. That strip, light rail molding, is simple to buy and easy to get wrong in sequence: fitted too early it has to come off for the electrician, and chosen without a thought for the bulbs it hides, it frames a light that turns the cabinets a colour nobody picked.
Three things meet at the underside of an upper

GPG LRM, the light rail molding in this finish, is $149.50. It is applied along the bottom front edge of the wall cabinets and drops a little below the box, and it does three jobs at once. It gives the underside of the run a finished front edge. It shields the eye from the light fixture. And it sets a horizontal reference that the backsplash, the fixture and the electrician all work to.
The drop below the box and the piece length are not published on the live list, and both matter here: the drop decides which fixtures it can hide, and the length decides how many joints appear along a long run. Ask us for both before the fixtures are bought. Every other decision on this page hangs off those two numbers.
Picking the bulb colour for a greyed sage
Under-cabinet lights are sold by colour temperature, measured in kelvin, and the choice matters more with a coloured cabinet than with a white one. The light washes the counter and backsplash first, but it also catches the light rail, the lower edge of every door and the inside of any open shelf, so the cabinet colour you see at night is partly the bulb’s colour.
This green is a quiet, greyed sage rather than a bright one, and greys are easily pushed around by light. As a general tendency, warm light pulls grey-greens towards yellow and olive, while cooler light pushes them towards grey and can make them look flat. The table sets out what usually happens; treat it as a starting point, not a promise, because tile, stone and wall colour all bounce into the result.
| Colour temperature | On the cabinet | On a white or cream backsplash | Good for |
|---|---|---|---|
| 2700K (warm) | Leans yellow-olive; cosy but can muddy the grey | Creamy, candle-like | Evening mood, warm brass hardware |
| 3000K (soft warm) | Stays closest to the daytime sage for most people | Warm white without yellowing | The usual safe choice |
| 3500K (neutral) | Slightly cooler, more grey showing | Clean white | Marble or quartz with grey veining |
| 4000K (cool) | Greyer and flatter; the green recedes | Crisp, task-like | Heavy prep areas, black or nickel hardware |
The only real test is to put a door sample on the counter at night under the actual strip you plan to buy, next to a tile offcut. If you use dimmable fixtures, check the sample dimmed as well, because many LED strips warm up or shift as they dim. Our green cabinet guide covers daylight and bulb behaviour across the whole family of sage and moss greens.
Where the backsplash tile stops is decided by the rail
Without a rail, the tile has to meet the underside of the cabinet box exactly, and every course is planned so that the top cut is clean and even along the whole run. With a rail, the tile can run up behind it. The rail covers the top edge of the tile, so the last course can be a rough cut, and a slightly uneven cabinet line no longer shows as a tapering sliver of grout.
That changes how the tile is laid out. Count the courses from the counter up to the underside of the rail, not to the underside of the box, and let the tile setter plan full courses to that line. With a handmade or zellige-style tile, whose edges are irregular by design, the rail is the difference between a clean top edge and a ragged one. With a full-height stone slab, the rail hides the joint where the slab meets the cabinet, which is otherwise a caulk line at eye level.
Where the uppers stop at a window, the rail ends with the cabinet and the tile carries on to the window casing. Plan that end with the tile setter: a rail that stops in mid-air needs a clean return, and the tile beside it needs a finished edge. If a valance crosses the window, the two pieces meet at the same line and the valance page covers that junction.
Which trade goes first
The rail is the last thing fixed to the uppers, and most of the trouble with it comes from fitting it too early. The sequence that avoids a second visit runs like this.
- Decide the fixtures before the uppers are hung: strip or puck, hard-wired or plug-in, and where the power supply (the driver) will live. A driver can sit inside an upper, on top of it, or in the wall, and each choice means a different hole in a different place.
- The electrician roughs in power to the chosen point while the walls are open, so nothing runs across the backsplash later.
- The cabinets go up. Any holes through the cabinet bottoms for wiring are drilled now, from inside, where a small slip is hidden.
- The tile goes in, run up to the rail line rather than to the box.
- The fixtures are mounted and tested, positioned towards the front of the underside so the light falls on the counter rather than on the wall.
- Only then is the rail cut and fixed, and any nicks at the cuts are touched in from the touch-up kit ($62.40), which is worth ordering with the cabinets.
The reason for doing the rail last is simple. If a fixture has to be moved to clear the rail, or the rail has to come off to reach a fixture, the finished edge is damaged. Fitted last, it is fitted once.
Where the joints fall on a long run
A run of uppers longer than one piece of rail has joints in it, and where they land is a choice. Put each joint over the seam between two cabinet boxes, where the two face frames meet, so the joint is backed by solid material and lines up with a vertical line that is already there. A joint that lands in the middle of a door looks like a repair, and it is the first place the rail will show a hairline as the room moves through the seasons.
At an inside corner, where two runs of uppers meet over a corner cabinet, the rail is mitred and the two halves should be glued as well as pinned so the corner stays tight. At an outside corner, such as the end of a run beside a hood or a window, the rail returns along the cabinet side with a short mitred piece. Short returns are the pieces most often cut wrong, so allow for a second attempt when working out quantities, and cut them from a fresh length rather than an offcut with a damaged end.
Everything that crosses the rail line has to be planned with it: the side of a hood, the edge of a glass-door cabinet, a microwave shelf, a window casing. Mark each one on the elevation before the rail is cut, so the installer knows where every piece starts and stops.
Walls with open shelves instead of uppers
A lot of green kitchens swap one bank of uppers for open shelving, and the rail stops where the cabinets stop. The shelves carry their own light. LED floating shelves are listed in this collection from 24 to 60 inches wide, $487.50 to $1,027.00 in the standard finish, with Timber and Walnut wood options at their own prices, all on the floating shelf page. A wood shelf beside green uppers is one of the pairings that works best with this family of colours, and it means the lighting on that wall is built in rather than hidden by trim.
Where a run of uppers ends and shelves begin, finish the rail with a return against the cabinet side so the end grain of the cut does not face the room. The same applies wherever a run ends in open air, beside a hood or at the end of a peninsula.
Common questions
- What colour temperature under-cabinet light suits sage green cabinets?
- As a general guide, 3000K keeps a greyed sage closest to how it looks in daylight. 2700K warms it towards olive, and 4000K cools it towards grey. Test a door sample at night under the actual strip, dimmed as well as at full brightness, before buying fixtures for the whole kitchen.
- Where should backsplash tile stop under cabinets with light rail?
- Run it up behind the rail rather than to the underside of the cabinet box. The rail covers the top edge of the tile, so the last course can be a cut, and the tile setter plans full courses to the rail line instead of fighting an uneven cabinet bottom.
- Should light rail molding go on before or after the lights?
- After. Rough in power and decide the driver location before the cabinets go up, install the tile, mount and test the fixtures, then cut and fix the rail last. Fitting it early usually means taking it off again to reach a fixture.
- How much is light rail molding in this finish?
- GPG LRM is $149.50 per piece. The piece length and the drop below the cabinet are not published on the live list, so ask us for both before choosing fixtures or calculating quantities.
- Do I need light rail if I use open shelves on one wall?
- Not on the shelf wall. The rail stops where the uppers stop, finished with a return against the cabinet side. LED floating shelves, listed from 24 to 60 inches wide, carry their own lighting.
- Where should the joints in light rail go?
- Over the seam between two cabinet boxes, where the face frames meet, so the joint is backed by solid material and lines up with a line that is already there. Mitre and glue inside corners, return the rail along the cabinet side at open ends, and allow a spare length for the short returns.
Keep reading
The guides behind the numbers on this page.
- Green Kitchen Cabinets: Sage, Pistachio, and Moss Shades and Pairings
How this family of greens behaves under warm and cool light.
- How to Match Kitchen Cabinets With Countertops, Backsplash and Flooring
Choosing the tile that will run up behind the rail.
- Parts of a Kitchen Cabinet: Every Component Named
Where the light rail sits among the other named parts of a run.
- Kitchen Cabinet Samples: How to Order and Evaluate
How to test a sample under your own bulbs, not a showroom’s.


