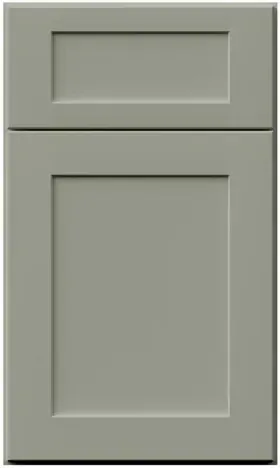


Galaxy Pistachio Green fillers as a layout decision: fill the gap, upsize the box, or split it
Reviewed September 2026 · Captivating Cabinets
The Galaxy Pistachio Green filler list has 24 parts on it and every one is a plain answer to a plain problem: a strip of painted wood that closes the space a three-inch cabinet module could not. What the list cannot tell you is whether a strip is the right answer at all. On most plans the leftover inches can go three ways. They can be filled, they can be absorbed by stepping one cabinet up a size, or they can be divided so the room stays symmetrical. Those are layout choices, and they change what the kitchen costs and how it looks far more than which filler you pick. This page works through them in that order.
Fill it or upsize the box: run the numbers before you default to a strip
A filler is dead space you pay for. A wider cabinet is storage you pay for. When the gap on a wall comes out at three inches, the first question is not which strip, it is whether one of the neighbouring boxes could simply be three inches wider. On this price grid the answer is surprisingly often yes, and in the upper run it is sometimes cheaper than the strip.
| Where | Box as drawn | One size up | Difference | Strip it replaces |
|---|---|---|---|---|
| Uppers, 30″ high | GPG W3030 — $383.50 | GPG W3330 — $403.00 | +$19.50 | GPG WF330 — $26.00 |
| Uppers, 30″ high | GPG W2430 — $364.00 | GPG W2730 — $377.00 | +$13.00 | GPG WF330 — $26.00 |
| Uppers, 36″ high | GPG W3036 — $451.75 | GPG W3336 — $490.75 | +$39.00 | GPG WF336 — $34.45 |
| Uppers, 42″ high | GPG W3042 — $526.50 | GPG W3342 — $578.50 | +$52.00 | GPG WF342 — $41.60 |
| Bases | GPG B27 — $516.75 | GPG B30 — $555.75 | +$39.00 | GPG BF3 — $26.00 |
| Bases | GPG B30 — $555.75 | GPG B33 — $633.75 | +$78.00 | GPG BF3 — $26.00 |
Read the top two rows twice. On a 30-inch-high upper, going from 24 to 27 inches wide costs $13.00 and going from 30 to 33 costs $19.50. The plain 3-inch wall strip at that height is $26.00. So the wider cabinet is the cheaper line on the order and it gives you three more inches of shelf, which is the opposite of how most people assume the trade works. At taller heights and on the base run the box costs more than the strip, but the gap is small enough that storage usually wins the argument.
Two limits keep this honest. First, you cannot upsize your way out of every filler. A run that dies into a wall or turns an inside corner still needs a strip there for door and drawer clearance, however the widths are juggled, and the sizing rules for that are in the end panels, scribe and filler guide. Upsizing removes the filler that exists only because the arithmetic was lazy, not the one doing a job. Second, wider is not always better on a door. A 33-inch double-door upper has two 16½-inch doors, which is fine; a single-door base pushed from 21 to 24 inches gets a door wide enough to swing into the person standing at the next cabinet. Check the door count on the wall cabinet and base cabinet grids before you swap a code.
Split the gap or take it at one end
Once the fillers that are genuinely needed have been identified, the second decision is where they go. A designer drawing a straight wall will usually put all the leftover at the end that meets the wall, because it is the easiest place to scribe. That is correct on an unbroken run. It is wrong wherever the run has a centre that the eye is going to look for.
Three features create that centre: a range with a hood above it, a sink under a window, and a pair of glass uppers either side of something. If the wall is 132 inches and the cabinets add up to 126, putting all six inches at one end pushes the hood three inches off the middle of the window-free wall, and a hood is exactly the element people read as the axis of the room. Split the six into two 3-inch strips, one either side of the range bay, and the hood lands dead centre. Nobody notices the strips. Everybody notices a hood that is off-centre, even when they cannot say why.
The same logic applies at a window. The sink base belongs on the window’s centreline, not the wall’s, and whatever the difference is gets taken in fillers either side of the sink run rather than at the far corner. That is also where the hand-drawn plan and the tape measure disagree most, because window openings are the least accurately drawn thing on most house plans. Measure the window’s centreline off both walls before the order goes in, as the kitchen dimensions guide suggests for every fixed feature.
- Centred feature on the wall (hood, window, a pair of glass uppers): split the leftover symmetrically either side of it.
- Run ending at a wall with no centred feature: take it at the wall end, where a strip can be scribed to whatever the plaster does.
- Inside corner: the clearance filler goes at the corner regardless, and any extra is taken at the far end rather than making the corner strip wider.
- Uppers above bases: line the upper fillers up with the base fillers below where you can, so the vertical breaks in the two runs read as one decision rather than two.
Which finish a filler takes when the kitchen is two colours

In a single-finish kitchen a filler matches everything, and the only question is width. The moment a second finish appears, every strip on the plan has to be assigned to one side or the other, and it is the kind of thing that gets decided on delivery day by whoever opens the box. Decide it on the drawing instead. The rule that works almost every time: a filler takes the finish of the cabinet it is fixed to, and it is ordered from that finish’s collection. A strip between two green bases is green. A strip between two white uppers is white, even if the bases below are green.
The common two-tone plans with this sage each resolve that rule slightly differently:
| The plan | Base and tall fillers | Wall fillers | The one to watch |
|---|---|---|---|
| Green lowers, light uppers (Frost, Linen or Dove) | Green, from this collection | The upper finish, from its own collection | A tall pantry in the run: it takes one finish top to bottom, so its tall filler does too |
| Light perimeter, green island | Perimeter fillers in the light finish | The light finish | The island usually needs no filler at all; if it does, it is green |
| All green, wood open shelving or a Timber or Natural Oak accent | Green | Green | A filler beside the wood element belongs to the green box, never the wood |
| Green tall run in an otherwise light kitchen | Green beside the talls, light elsewhere | Light | Where a green tall filler meets a light base run, the change lands on the filler edge; keep it straight and plumb |
The partner collections are Frost, Linen, Dove, Timber and Natural Oak. They share the Galaxy door and the same codes, so a WF336 in either finish is the same part in a different paint. Put both lists on one order so the whole kitchen ships together.
One more point that only comes up with a colour. On an all-white kitchen a filler that is a hair off in tone disappears into the general brightness. On a greyed green, the eye compares neighbouring surfaces more closely, and a strip that came from a later batch can read a shade apart from the door beside it. That is an argument for ordering every filler in this finish on the same order as the doors, spares included, rather than topping up later.
The 24 parts, read as a price ladder
The list sorts into plain strips at each height and faced overlay strips at each height. The overlay version has a finished front built like a door stile, so the gap reads as part of the cabinetry rather than as a board closing a space. Here is what each step costs.
| Height | Plain 3″ | Plain 6″ | Overlay 3″ | Overlay 6″ |
|---|---|---|---|---|
| Base | GPG BF3 — $26.00 | GPG BF6 — $43.55 | — | — |
| Wall 30″ | GPG WF330 — $26.00 | GPG WF630 — $48.10 | GPG OLF330 — $71.50 | GPG OLF630 — $113.75 |
| Wall 36″ | GPG WF336 — $34.45 | GPG WF636 — $65.00 | GPG OLF336 — $84.50 | GPG OLF636 — $146.25 |
| Wall 39″ | not listed | GPG WF639 — $71.50 | GPG OLF339 — $87.75 | GPG OLF639 — $156.00 |
| Wall 42″ | GPG WF342 — $41.60 | GPG WF642 — $78.00 | GPG OLF342 — $94.25 | GPG OLF642 — $172.25 |
| Tall 84–96″ | GPG TF396 — $84.50 | GPG TF696 — $152.75 | GPG OLF384 to OLF396 — $208.00 to $230.75 | — |
| Tall 120″ | GPG TF3120 — $156.00 | — | — | — |
Look at the 39-inch row. There is no plain 3-inch wall filler at that height on this list, only the 6-inch GPG WF639 and the 3-inch overlay GPG OLF339. If your uppers are 39 inches high and the plan calls for a narrow plain strip, the choice is to rip the 6-inch piece down on site or to pay $87.75 for the overlay version. Both work. Neither is what a quote copied from a 36-inch plan will say, so check the heights before you check the prices.
The overlay premium is steepest at the top of the ladder. A 3-inch overlay strip at 96 inches, GPG OLF396 at $230.75, costs more than the 6-inch plain tall filler at $152.75. It earns that where a tall strip sits in plain view beside a pantry or an oven tower at the end of a run, and not in a corner nobody looks into. The codes themselves are decoded in how to read cabinet SKU codes.
When six inches should hold something
A six-inch gap is wide enough to be worth using, and this collection has three ways to do it that are not a filler at all. The first is a 6-inch wine rack in the upper run: GPG WC0630 at $273.00 for 30-inch uppers, rising to GPG WC0642 at $341.25 for 42-inch. That is $224.90 more than GPG WF630 at the same height, for a column of bottles instead of a painted board.
The second and third are pull-outs catalogued on the cabinet accessories page. In the upper run, wall filler pull-outs run from GPG SPO-WF330 at $380.25 to GPG SPO-WF642 at $497.25, which turns the strip beside a range hood into a spice column at eye height. In the base run, GPG SPO-BF3 is $334.75 and GPG SPO-BF6 is $380.25, with Blum-runner versions at $585.00 and $695.50. These are real boxes with their own depth and hardware, so they have to be on the plan from the start rather than swapped in for a strip after delivery.
The honest filter: put storage in a gap you stand beside every day, which in practice means either side of the range or the sink. A pull-out at the far end of a run is a strip that cost ten times as much. More ways to use narrow space are collected in space-saving cabinet solutions.
Putting it on the order
Work through the page in its own order. Find the fillers that do a clearance job and keep them. Look at every other strip and ask whether a box one size up would absorb it for less or for not much more. Where the wall has a centre, split what is left around it. Then assign a finish to each strip if the kitchen is two-tone, and add one spare at each width and height you are using, because a spare is $26.00 and a second delivery is a lost day.
If that sounds like a lot of arithmetic for a strip of wood, it is exactly the arithmetic our designers do on a free 3D design. Send the wall dimensions and window and appliance positions; a designer replies within one business day and the full design and quote follow within 24 to 48 hours, with every filler placed and sized. Fillers ship with the rest of the Galaxy order, pre-assembled, in seven days to three weeks, and the whole range is on the collection page. If you are unsure how the green will look beside a light upper, a door sample is $25.00 and settles it in your own light.
Common questions
- Is it cheaper to use a filler or a wider cabinet?
- In the upper run it is often cheaper to go wider. On this grid a 30-inch-high upper costs $19.50 more at 33 inches wide than at 30, while the 3-inch wall filler it replaces is $26.00. At 36 and 42 inches high and on bases the box costs a little more than the strip, but you gain three inches of storage for the difference.
- How do I keep a range hood centred when the cabinets do not fill the wall?
- Split the leftover inches into two equal fillers, one either side of the range bay, instead of putting all of it at the end of the run. A six-inch shortfall becomes two 3-inch strips and the hood lands on the centre of the wall. Do the same at a sink under a window, working from the window centreline.
- What colour should a filler be in a two-tone kitchen?
- The colour of the cabinet it is fixed to. Base and tall fillers in a green-lower kitchen are green; wall fillers take the finish of the uppers. A tall pantry takes one finish top to bottom, so its tall filler matches it. Order each strip from its own finish’s collection on the same order as the doors.
- Is there a 3-inch wall filler for 39-inch uppers?
- Not as a plain part on this list. At 39 inches you have the 6-inch GPG WF639 at $71.50, which can be ripped down, or the 3-inch overlay GPG OLF339 at $87.75. The 30, 36 and 42-inch heights all have a plain 3-inch strip.
- Can a 6-inch gap be used for storage instead?
- Yes. In the upper run a 6-inch wine rack, GPG WC0630, is $273.00, and wall filler pull-outs start at $380.25. In the base run GPG SPO-BF3 is $334.75. All of them need to be on the plan before ordering, and they earn their money beside the range or the sink.
Keep reading
The guides behind the numbers on this page.
- Cabinet End Panels, Scribe Molding and Fillers Explained
The clearance fillers you cannot design away, and how wide they need to be.
- Important Kitchen Dimensions Before Buying Cabinets
How to measure window and range centrelines before splitting a gap around them.
- Green Kitchen Cabinets: Sage, Pistachio and Moss
Where green goes in a two-tone plan, which is what decides each filler’s finish.
- Kitchen Layouts Explained
Every layout produces its fillers in different places; this shows where.
- Space-Saving Cabinet Solutions
For the six-inch gap that should be holding spices or bottles instead.


