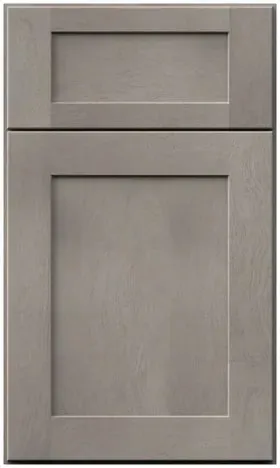


The door in front of the tray: fitting Galaxy Horizon roll-out drawers where the swing is tight
Reviewed September 2026 · Captivating Cabinets
Prices quoted in this article were read off the grid on the review date; the live price grid on this page governs.
Every one of the Galaxy Horizon roll-out drawers sits behind a hinged door, and that door is the part of the purchase nobody prices. A tray can only come out if the door has already swung out of its way, so a tray in the wrong box is a tray that stops two inches short, grinds against a hinge, or needs the door dragged past the handle of the cabinet next to it. This page is about the geometry around the tray rather than the tray itself: which positions in a run give the door room, which ones do not, what the cheap fix costs, and how to fit trays into a kitchen that is already standing.
A roll-out is a door problem before it is a drawer problem

A drawer and a roll-out tray look alike when they are open and behave very differently on the way there. A drawer front is fixed to the drawer, so there is nothing in its path. A roll-out tray travels through an opening that a hinged door has to vacate first, and the tray is only as good as the angle the door reaches.
The doors on this line are full overlay: they cover the face frame almost entirely and hang on Blum hinges with Blumotion soft-close and a quick-release clip. When one is opened to a right angle, the door, its hinge arm and the hinge cup still project a little way into the opening on the hinge side. A tray narrow enough to clear the face frame can still meet that hardware. That is why the opening angle matters, and it is also the one number the listing does not publish, so ask us for it against your cabinet code rather than assuming it.
In the middle of a run this almost never matters, because a door with open floor on both sides can go well past square and take its hardware with it. The trouble is at the edges: the end of a run, the box beside something tall, and the box that meets another run at a corner. Those are also the places where people most often want a tray, because the end box is usually where the pans or the cleaning things go.
Four places in a run where the door cannot open far enough
Walk your plan box by box and mark any base that sits in one of these four positions. If a box you wanted a tray in is on the list, you still have options; you just need to decide them now, while it is a drawing.
- Against a side wall. The hinge side of a door hung right beside a wall cannot open past the point where the door meets the plaster, so the hardware stays in the opening. The usual fix is a filler between the box and the wall, which moves the whole door out from the plane of the wall.
- Beside a refrigerator or a tall cabinet. Same problem, but taller, and the thing it hits is a stainless door or a finished end panel you do not want marked. A fridge also needs its own door to swing wide, so the two often compete for the same inches.
- At an inside corner. Where two runs meet, a door on one run can collide with the door or the pull on the other. The tray in the box nearest the corner is the one most likely to catch.
- Beside the dishwasher, hinged towards it. The dishwasher itself does not block the door, but its handle can, and when the dishwasher is open the tray next to it cannot be reached anyway. Hinge that door away from the machine if a tray is going in.
The door hand is the free fix in three of those four. A single-door base can often be hinged on the side away from the obstruction, so the hardware ends up in open air. On a two-door box the hinges are on both outside edges by definition, and one of them will always be the side against the wall. That is the case where a filler earns its money.
The filler that fixes it, priced against the tray it rescues
A base filler is a strip of finished face material that sits between a cabinet and whatever it butts into. It exists to give a door, a drawer or a pull room to clear. On this finish the plain base fillers are GH BF3 at $26.00 for three inches and GH BF6 at $43.55 for six, on the filler list. The filler is ripped down on site to the width the wall actually needs, and the narrow side of it goes to the wall.
Put that against what it protects. A standard tray for a 24-inch box is GHZ ROD-B24 BLUM E at $214.50, and two of them in the full-height door base GH B24FD at $403.00 come to $832.00. The filler is three per cent of that. Without it, the most likely outcome is not that the tray fails outright but that it works badly: it catches every time, the door gets forced past its natural stop, and the tray becomes the cupboard you avoid.
| Box width | Standard tray (E) | High-sided tray (H) | Full-height door box |
|---|---|---|---|
| 15″ | GHZ ROD-B15 BLUM E · $188.50 | GHZ ROD-B15 BLUM H · $240.50 | GH B15FD · $341.25 |
| 18″ | GHZ ROD-B18 BLUM E · $201.50 | GHZ ROD-B18 BLUM H · $250.25 | GH B18FD · $373.75 |
| 21″ | GHZ ROD-B21 BLUM E · $204.75 | GHZ ROD-B21 BLUM H · $253.50 | GH B21FD · $399.75 |
| 24″ | GHZ ROD-B24 BLUM E · $214.50 | GHZ ROD-B24 BLUM H · $263.25 | GH B24FD · $403.00 |
| 27″ | GHZ ROD-B27 BLUM E · $217.75 | GHZ ROD-B27 BLUM H · $266.50 | GH B27FD · $442.00 |
| 30″ | GHZ ROD-B30 BLUM E · $227.50 | GHZ ROD-B30 BLUM H · $279.50 | GH B30FD · $461.50 |
| 33″ | GHZ ROD-B33 BLUM E · $230.75 | GHZ ROD-B33 BLUM H · $282.75 | GH B33FD · $468.00 |
| 36″ | GHZ ROD-B36 BLUM E · $240.50 | GHZ ROD-B36 BLUM H · $286.00 | GH B36FD · $490.75 |
Two things the table shows that matter for the door question. First, the full-height boxes at 15, 18 and 21 inches have a single door, so the hinge side can be chosen and the filler is often avoidable. From 24 inches up they are listed as double-door boxes, and one of those two doors will face the wall. Second, a wider box does not make the geometry easier: the tray gets wider in step with the box, so the hardware on the hinge side is just as close to the tray at 36 inches as at 15.
Why the filler has to be on the drawing, not added later
On a painted kitchen a forgotten filler is an annoyance. On this finish it has a second cost, because the filler is a stained face that will sit in a straight line beside your doors. Fabuwood says plainly that colour variation between stained parts is normal, and a filler ordered months after the kitchen is a separate production run. Ordered with the cabinets it arrives from the same batch, has the same months of daylight as the doors, and disappears into the run.
There is also a practical reason. Adding a filler after installation means moving a box sideways, which on a base means lifting the countertop or cutting the filler to slip into a gap that was never planned. Neither is the kind of job you want to book because of a tray. Settle it on the plan, and tell us in the design request which boxes are getting trays, so the fillers get drawn where the doors need them. The free 3D design shows each door swinging, which is the easiest way to see the problem before it is built.
Adding trays to a kitchen that is already installed
If the kitchen exists, the door geometry is fixed and the only question is whether the tray will clear it. Test that before you order, not after.
- Open the door the way you open it in real life, not as far as it will go. If it hits a wall, a pull or a fridge at a certain point, that is your working angle.
- Look along the inside of the hinge side at that angle. Anything that projects into the opening, whether hinge, door edge or the pull of a neighbouring cabinet, is what a tray will meet.
- Find the cabinet code on your original quote or on the label inside the box. The tray is ordered against that code, not against a width you measure, because the part is made for that box.
- Clear the box and check the floor. Anything on the bottom that should not be there, from a shelf pin to a pipe, has to be dealt with before the runners go in.
- Fit the tray to the instructions it arrives with. How the runners attach is not on the listing, so read the sheet rather than improvising, and keep the lowest tray low enough that tall bottles still stand on it.
Send us a photo of the open door at its working angle along with the cabinet code, and we will tell you whether a tray will run cleanly or whether you are better off with a plain shelf in that particular box. The full roll-out list is on the same page as the other cabinet accessories, and trays arrive with their own Blum runners.
The first week: checks that save the door edge

Once the trays are in, spend five minutes with them empty and then five minutes loaded. Pull each one to full extension with the door at its working angle and listen: a tray should run in silence, not tick against a hinge. Push it home and check the door closes on its soft-close without anything on the tray touching the back of it. Load it with what it will really carry, then repeat, because a loaded tray can sit slightly lower at the front and change what it clears.
The one habit a roll-out creates is opening the door wide and fast, every time, because you are about to pull something out. That puts the door edge where it can meet the neighbour. If a door touches a wall, a pull or an appliance at full swing, fit a small clear bumper at the contact point on day one. It costs pennies and it is the difference between a door edge that stays sharp and one that is worn through the finish by next year.
If an edge does get marked, the repair on this finish is different from a paint repair. Fabuwood does not make spray cans for stained finishes. The Touch Up Kit at $62.40 is a stick, a marker and a scraper, and it works because a small nick on a stain exposes a little wood rather than a bright substrate. Order one with the kitchen, while the finish batch is current, so it is in the drawer on the day you need it. The stained-cabinet guide covers how stain repairs blend.
What the stain does not change about a tray
It is worth being clear about the opposite case. The tray itself lives behind the door, and the inside of every box in this line is a natural wood veneer. Nothing about a roll-out has to match a door face, which means a tray ordered two years later raises no colour question at all. That is unusual among the parts on this finish, and it is why trays are the safest thing to add later: every question above concerns the door and the filler, not the tray.
It also means the side-height choice is purely functional. The high-sided H tray costs $52.00 more than the standard at 15 inches and $45.50 more at 36, and it earns that where bottles live. The standard E suits pans and anything lifted out over the side. Neither decision changes how the kitchen looks with the doors shut.
Common questions
- Why does my roll-out shelf hit the cabinet door?
- Because the door is not opening far enough to take its hinge and edge out of the tray’s path. It usually happens on a box against a wall, a fridge or a corner. The fix on a new kitchen is a filler between the box and the obstruction (GH BF3 is $26.00); on an existing one, check whether the door can be re-hinged on the other side, or put a plain shelf in that box.
- Do I need a filler next to a wall if I want roll-out trays?
- On a two-door base against a wall, almost always, because one door will hinge on the wall side. On a single-door base, hinge the door away from the wall and you may not need one. Decide it on the drawing: on a stained finish a filler ordered later is a separate production run and can read slightly different beside the doors.
- Can you put roll-out drawers in a cabinet next to the refrigerator?
- Yes, if the door can swing clear of the fridge. Allow a filler between the base and the fridge or its end panel, and hinge the base door away from the fridge where you can. Test it on the plan: both doors need their own room to open.
- How do you install roll-out shelves in existing cabinets?
- Check the door clears first, with it open at the angle you really use. Order the tray against the cabinet code on your quote (GHZ ROD-B24 BLUM E is the $214.50 standard tray for a 24-inch box), clear the box, and fit it to the instructions that ship with it, since the mounting details are not on the listing.
- How much are roll-out drawers?
- Standard trays run from $188.50 (15-inch) to $240.50 (36-inch); the high-sided versions run from $240.50 to $286.00. Each arrives with Blum runners. Nothing is listed for boxes wider than 36 inches.
- How do you repair a chipped stained cabinet door edge?
- With a touch-up kit, not paint. Fabuwood makes no spray can for stained finishes; the store’s Touch Up Kit at $62.40 is a stick, a marker and a scraper. Fit a small bumper at whatever the door was hitting so the chip does not come back.
Keep reading
The guides behind the numbers on this page.
- Cabinet End Panels, Scribe Molding & Fillers Explained
Where fillers go in a run and why they are ripped to size on site.
- Types of Base Cabinets: Sizes & Standard Dimensions
Single-door, two-door and full-height boxes, and which ones take trays.
- Why Blum Soft-Close Hinges Are Worth the Investment
The hinge that sits beside every tray, and how it adjusts.
- Brown Kitchen Cabinets: Stains, Shades & Pairings
How a stained door wears and how its repairs blend, compared with paint.
- Important Kitchen Dimensions to Know Before Buying Cabinets
The clearances a door, a tray and a person all need at once.
- Free 3D Kitchen Design
A designer replies within one business day; the full drawing and quote follow in 24–48 hours.


