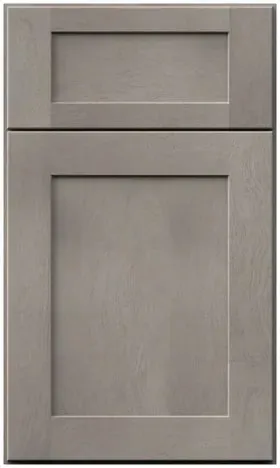


Galaxy Horizon toe kick: the most forgiving strip in the kitchen, and how to repair it
Reviewed September 2026 · Captivating Cabinets
Prices quoted in this article were read off the grid on the review date; the live price grid on this page governs.
Every other piece of trim in this family has a reason to be fussed over: crown at the ceiling, corner molding at eye level, a mirror frame a foot from your face. Galaxy Horizon toe kick is the exception. It sits recessed under the base cabinets, in their shadow, and is only ever seen from above at a steep angle. That makes it the most forgiving strip of stained wood in the kitchen. Use that forgiveness deliberately, and learn the one repair it will need, because it also takes more knocks than anything else in the room.
Why small differences disappear at floor level

Three things work in the kick’s favour. It is recessed, usually a few inches behind the door faces, so the cabinet above shades it. It is low, so a standing adult sees it from well above, at a steep angle where grain and small differences in tone are hard to read. And it is a narrow band, not a broad face, so the eye treats it as a line under the cabinets rather than as something to study.
On a stain, that matters. Fabuwood says colour variation between stained parts is normal. On a door, a panel or a crown, a stick that sits a shade lighter can stand out. On the kick, the same difference usually disappears into the shadow.
Spend the forgiveness on purpose
When the trim for a stained kitchen arrives and is sorted in daylight, there is usually one stick of something that sits slightly lighter, darker or busier than the rest. On crown or scribe it needs a hidden spot. The kick is where hidden spots are everywhere.
- Put the odd stick of toe kick under the least-seen run: the pantry wall, behind the island from the entry, beside the fridge.
- Use the best-matched sticks at the two places a kick is seen square-on: at the end of a run that faces into the room, and on an island’s seating side, where people sitting look down at it.
- Where the kick has to be joined, do it under a cabinet seam. It is barely visible anyway, but lining it up with the seam above makes it vanish completely.
- Keep the direction consistent: every stick with the same end pointing the same way, so the grain runs in one direction along each run.
This is also the place for a stick from a later order, if one is ever needed. A crown stick bought five years on may stand out against the original run at the ceiling. A toe kick stick bought five years on, fitted under the least-seen run, usually will not.
The four parts
| Part | Code | Price | What it does |
|---|---|---|---|
| Toe kick, 8 ft | GH TK8 | $55.90 | The standard strip |
| Toe kick 3/4″, 8 ft | GH TK8-3/4 | $58.50 | Thicker strip, for meeting a panel face |
| Toe kick cap | GH TKC | $7.80 | Closing an open end |
| Toe kick clip 3/4″ | GH TKC-3/4 | $10.40 | Fixing the thicker strip so it can come off |
Most runs use GH TK8. The three-quarter-inch strip is for where the kick meets a finished panel that comes down to the floor, so the two read as one plane. The cap closes a kick that ends in the open, and the clip holds the thicker kick in place so it can be taken off without damage, which matters for the repair below.
What a scuff does to a stained kick

The kick is where feet go. Shoes, boots, a vacuum head, a mop bucket and a robot vacuum all meet it, and over the years it collects marks. On a painted kick a deep scuff chips the paint and shows the primer or bare wood underneath as a pale spot. On a stained kick most scuffs are different: a surface mark on the topcoat, a scratch through it that shows a lighter line of wood, or a dent where something hard hit the strip.
Each needs a different fix, and the good news is that a stain is often easier to repair here than paint. There is no primer layer to hide, the grain helps disguise a patch, and in the kick’s shadow a good repair is nearly impossible to find.
Using the touch-up kit on a kick
Fabuwood makes a touch-up kit for its stained finishes, and in this finish it is $62.40. It holds a fill stick, a marker and a scraper. The spec book is explicit that spray cans are not available for stained finishes, so this kit is the repair route. Here is how each part is used on a kick.
- Surface scuffs first. Many marks on a kick are rubber or dirt sitting on the finish rather than damage to it. Wipe with a damp cloth and a drop of dish soap, then dry. If it is gone, stop.
- Scratches with the marker. A scratch that shows a lighter line of wood gets the marker, drawn along the scratch in the direction of the grain, then wiped lightly with a dry cloth so it does not sit on the surrounding finish. Build it up in thin passes.
- Dents and gouges with the fill stick. Rub the stick across the dent until it is overfilled, then use the scraper to level it flush with the surface. Scrape along the grain, not across it. A light pass of the marker over the fill ties it in.
- Check it from standing height. Stand where you normally stand and look down. If you cannot find it, the repair is done. Kicks are not viewed from knee height, and repairs should not be judged from there.
Keep the kit with the spare sticks and use it on the first scuff rather than waiting for many. The kit is listed with the loose parts or directly as the touch-up kit.
Fit it after the other trades have gone
The kick takes its worst punishment before the kitchen is even finished. During a renovation, the base cabinets go in, and then the countertop fabricator, the plumber, the electrician, the tiler and the flooring fitter all work at their feet. Toolboxes are set down against the kick, ladders are leaned on it, and a floor sander runs along it.
So fit the kick last, after the floor is down and the other trades have finished. It goes on quickly, and fitting it at the end means it starts its life unmarked. If it has to go on earlier, for example because the floor goes in after the cabinets and has to run under the kick line, cover it with strips of cardboard taped to the cabinet above, not to the kick itself, since tape can lift the finish.
When to take the kick off instead
A kick soaked by a leak, split along its length or badly gouged is easier to replace than to fix, and it is the easiest trim in the kitchen to replace. That is the reason for the clip: a kick held with clips comes off without damage to the cabinets or floor. If yours was fixed with clips, pull the strip, fit a spare or a new stick, and clip it back.
Because of everything above, a replacement kick from a later order is the one late purchase that rarely shows. Fit it under the least-seen run and move an original piece, if needed, to the visible place. Keep one spare stick from the first order anyway; at $55.90 it is the cheapest insurance in the kitchen.
We’re builders who sell cabinets, and the kick is where we see a kitchen’s daily wear first. Planning the run is covered on the toe kick page, the base cabinets it runs under are with the rest of the collection, and the free 3D design shows where each kick goes.
Common questions
- How do you fix scuffs on a toe kick?
- Wipe first with a damp, soapy cloth, since many marks sit on the surface. For a scratch, draw the touch-up marker along it with the grain and wipe lightly. For a dent, overfill with the fill stick and scrape it flush along the grain. Judge the result from standing height.
- What is in the touch-up kit and how much is it?
- A fill stick, a marker and a scraper. In this finish it is $62.40. Fabuwood does not make spray cans for stained finishes, so the kit is the repair route.
- Does the toe kick need to match the cabinets exactly?
- It is supplied in the same finish, and because it is recessed, in shadow and seen from above, small tone differences rarely show. That makes it the place to use a stick that sits slightly off, or one bought later.
- Which toe kick parts do I need?
- Most runs use GH TK8 at $55.90 per eight feet. Use GH TK8-3/4 at $58.50 where the kick meets a finished panel face, GH TKC at $7.80 to close an open end, and GH TKC-3/4 clips at $10.40 so the thicker kick can be removed.
- Should I replace or repair a damaged toe kick?
- Repair scuffs, scratches and dents with the kit. Replace a kick that has been soaked, split or badly gouged; if it was fixed with clips, it comes off without damage to the cabinets or floor.
Keep reading
The guides behind the numbers on this page.
- How to Clean and Care for Kitchen Cabinets
Cleaning without wearing the finish, from the doors down to the kick.
- Cabinet Skin Panels and Gables
How finished sides and panels meet the floor and the kick.
- Parts of a Kitchen Cabinet, Every Component Named
Where the toe kick sits in a base cabinet and what it hides.
- How Long Do Kitchen Cabinets Last?
Which parts wear first, and what keeps a kitchen looking new.


