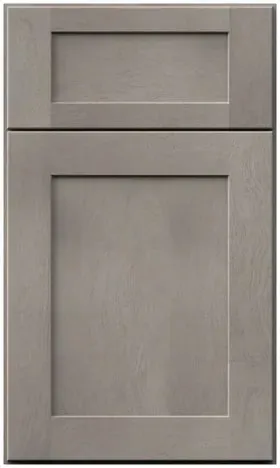


Galaxy Horizon scribe molding: doing the job caulk and paint do on a painted kitchen
Reviewed September 2026 · Captivating Cabinets
Prices quoted in this article were read off the grid on the review date; the live price grid on this page governs.
On a painted kitchen, the gap between the last cabinet and a crooked wall is often closed the quick way: a bead of caulk, smoothed with a finger and painted over in the cabinet colour. It works because the paint covers everything. Galaxy Horizon scribe molding exists because that shortcut is not available on a stain. There is no cabinet-colour paint to cover the caulk, a caulk bead on stained wood stays visible as a line of something that is not wood, and a wide one looks like a repair. On this finish, the scribe does the job the caulk and paint do elsewhere.
Why caulk does not work on a stain the way it does on paint

Caulk is a flexible filler. On a painted cabinet it disappears for one reason: after it cures, it is painted with the same paint as the cabinet, so the joint, the caulk and the cabinet all end up one continuous colour. Stained cabinets cannot be treated that way. Their colour is built up in the wood by the factory’s finishing process, and the grain shows through it; caulk has no grain and cannot take that colour. Fabuwood does not even supply spray cans for stained finishes, precisely because the finish is not something you can reproduce with a coat of paint.
Wood-tone caulks exist, and they are useful for a hairline. But a tinted caulk is a solid colour with no grain, and against a stained door it reads as a thin line of plastic. The wider the gap, the more obvious it gets. A quarter-inch bead of it down the full height of a pantry is the kind of thing people notice the first time they walk in.
So the rule on this finish is simple: the gap is closed with wood, and caulk is only used on the wall side, in the wall’s colour, where it belongs to the wall.
Two strips, both eight feet
| Part | Code | Price | Profile |
|---|---|---|---|
| Scribe molding, simple, 8 ft | GH SM8-S | $39.00 | Plain flat strip |
| Scribe molding, decorative, 8 ft | GH SM8-D | $41.60 | Shaped edge |
Both are thin strips, sold in eight-foot lengths, fixed to the cabinet and planed along the back edge to follow the wall. The simple one is a flat face and disappears into the cabinet side; the decorative one has a shaped edge and reads as trim. On this finish the simple strip is usually the better choice, for a reason that has to do with grain: a plain strip, grain running along its length and set flush with the cabinet side, reads as part of that side. A shaped strip reads as a separate piece added on.
At $39.00 and $41.60 for eight feet, scribe is the cheapest finished wood in the collection. It is also the one part where having a spare stick saves a return trip, since planing is easy to overdo.
Which caulk goes where
There are three joints at a cabinet-to-wall meeting, and each takes a different treatment on a stained kitchen.
- Scribe to wall. After the scribe is planed to the wall, a hairline may remain where the wall has a small bump. Close that with a paintable acrylic caulk and paint it the wall colour. It then reads as part of the wall, not the cabinet. Keep it to a hairline; if it needs more, plane the scribe again.
- Scribe to cabinet. This joint is wood against wood, both in the same finish. It should not need any caulk. If a small gap shows here, the scribe is not tight to the cabinet; fix it with a pin, not a bead.
- Cabinet top or bottom to wall, where the scribe stops. At the top of a wall cabinet or the bottom of a base, the scribe’s end meets a crown, a light rail or a toe kick. Those are wood-to-wood joints again and are dealt with by cutting, not caulking.
The takeaway: caulk colour follows the wall, never the cabinet. If the wall is later repainted, the caulk line is repainted with it, and the stained wood never has anything on it but its own finish.
The planed edge is raw wood, so hide it
Scribing means taking the finish off the back edge of the strip: the installer runs a compass along the wall, marks the strip, and planes to the line. That edge is bare wood. On paint it would be painted afterwards; on a stain it would look lighter and rougher than the finished face.
Two habits keep it out of sight. First, back-bevel the planed edge a few degrees, so only the front arris actually touches the wall and the rest of the cut face angles away out of view. Second, run a stain marker from the touch-up kit along the front arris of the planed edge, the thin line that can catch the eye. The kit is $62.40 in this finish and contains a fill stick, a marker and a scraper.
The ends of the strip, at the top and bottom, are the other exposed cuts. They usually disappear under a crown or light rail at the top and a toe kick at the bottom. Where one stands clear, colour it with the marker.
When the gap is too wide for a scribe
A scribe closes a gap that varies along its length, typically from nothing to about half an inch. Past that, you need a filler: a wider finished strip set between the cabinet and the wall, which is then itself scribed. GH BF3, a three-inch base filler, is $26.00; the filler page has the wall and tall sizes.
On a stain there is an extra reason to use a filler earlier rather than later. A wide scribe planed down heavily to follow a bad wall exposes a lot of raw edge and leaves a strip that tapers visibly from top to bottom. A filler scribed lightly keeps its finished face and a consistent width. If the wall is more than half an inch out over the height of a tall cabinet, we would plan a filler on the drawing from the start.
The end panels, scribe and fillers guide explains the three pieces side by side, and our free 3D design plans them against your measured walls.
Full-height scribes on tall cabinets
A pantry or oven tower against a wall needs a scribe that runs its full height, and that is where this part is at its most visible. A wall cabinet’s scribe is thirty to forty-two inches long and sits above the counter; a tall cabinet’s runs from the toe kick to the crown, seven or eight feet in one unbroken line at the edge of a big flat side.
Two things follow on a stain. First, never join a scribe on a tall cabinet. An eight-foot stick covers a tall unit in one piece, so buy one per tall cabinet and do not try to make it from two offcuts; a joint halfway up a full-height scribe is a horizontal line across a strip that should read as part of the cabinet side. Second, pick the stick. Hold each candidate against the tall cabinet’s side in daylight before planing, and use the one whose tone sits closest, since it will be compared with that side along its whole length.
Tall cabinets also find the worst of a wall. Over eight feet, a wall that looked straight can be half an inch out, which is the point at which a filler is the better answer. The tall cabinets list the units; measure the wall behind them first.
How much to order, and why all of it at once
Count every place a cabinet side meets a wall, on both walls and talls, and allow one eight-foot stick per two base or wall meetings and one per tall cabinet meeting. Then add a spare. Planing is easy to overdo, and a strip taken too far cannot be put back.
Order it with the cabinets. Fabuwood says colour variation is normal on stained parts, and its warranty says replacement parts may not match existing cabinets. A scribe sits flush against the side of a cabinet, so a strip from a later order sits edge to edge with a panel from the first order, which is the most direct comparison of all. The scribe molding page prices both strips, and the rest of the collection is where the cabinets they finish are listed.
Common questions
- Can you caulk stained cabinets to the wall?
- Only a hairline, on the wall side, in the wall colour. Caulk cannot take a stain and has no grain, so a visible bead against stained wood looks like a line of plastic. Close the gap with scribe molding, and use paintable caulk painted the wall colour only for what is left.
- What color caulk should I use with wood cabinets?
- Match the wall, not the cabinet. A paintable acrylic caulk painted with the wall colour makes the joint part of the wall. Tinted wood-tone caulks can work for a hairline but read as solid colour against real grain.
- Simple or decorative scribe molding on a stained cabinet?
- Usually simple. GH SM8-S at $39.00 is a flat strip that reads as part of the cabinet side. GH SM8-D at $41.60 has a shaped edge and reads as an added trim piece.
- How do I hide the planed edge of a scribe?
- Back-bevel it a few degrees so only the front edge touches the wall, then run the stain marker from the touch-up kit along that front edge. The kit is $62.40 in this finish.
- When do I need a filler instead of scribe molding?
- When the gap is more than about half an inch at its widest. A filler, such as GH BF3 at $26.00 for a base, keeps a consistent width and is scribed only lightly, so less raw wood is exposed.
Keep reading
The guides behind the numbers on this page.
- Cabinet End Panels, Scribe Molding and Fillers Explained
The three pieces that meet a wall, and when each one is right.
- Important Kitchen Dimensions Before Buying Cabinets
Measuring the room, including how far walls are out of plumb.
- Brown Kitchen Cabinets: Stains, Shades and Pairings
Why a stain behaves differently from paint at joints and edges.
- Kitchen Cabinet Terminology Glossary
Scribe, filler, arris and the other words on a trim drawing.


